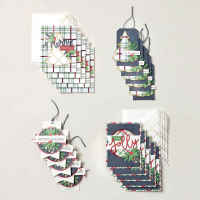
Festive Plaid Pop-outs Kit Part 2

Last week I shared my Facebook Live creating the Christmas tree cards and gift tags using the beautiful Festive Plaid Pop-Outs Kit from Stampin’ Up!

Today I’m back with another set of projects from this kit, and this time we’re playing with the circle designs!

I had so much fun creating the first set that I decided to record another video to show you how I put together the remaining cards and tags. It’s lovely to see how the same kit can give you different looks while keeping everything coordinated.

Creating the Circle Cards and Tags

For this video, I’ve pre-recorded the project so you can craft along with me whenever it suits you.

I’ll take you through creating the circle cards and coordinating tags, using the clever pop-out pieces included in the kit.

https://youtube.com/live/HiDM1TEsBKA?feature=share

Just like the Christmas tree designs, the circle elements make great use of the pieces that pop out of the card fronts. Rather than letting those pieces go to waste, they’re used to decorate the gift tags!

I love a kit that makes the most of every little piece.

Two Videos, Lots of Christmas Projects!

If you missed last week’s video, you can also watch me create the Christmas tree cards and tags here:

Between the two videos, I’ve shared both sets of designs included in the kit. It’s a lovely way to see all the possibilities and get plenty of inspiration for your own Christmas crafting.

The kit makes 10 cards and 10 coordinating tags, with five of each of the two designs. It includes the printed card bases and envelopes, precut pieces, gold foil accents, twine, adhesive and instructions – so there’s very little preparation needed before you start creating.

Getting Ready for Christmas

With Christmas getting closer, it’s a great time to start preparing those handmade cards and gift tags. Having them ready means one less thing to think about when the busy festive season arrives!

The Festive Plaid Pop-Outs Kit is a wonderful option if you enjoy creating but don’t always have lots of time for cutting, measuring and preparing supplies.

Where to Find the Kit

If you’d like to make these projects yourself, you can find the Festive Plaid Pop-Outs Kit in my online store.

SHOP THE FESTIVE PLAID POP-OUTS KIT

I hope these two videos have given you some ideas for using this kit. I’d love to know which design is your favourite – the Christmas trees or the circles?

Happy crafting!

Product List
🦋 Create Beautiful Cards with the Butterfly Garden Kit

If you joined me on Facebook Live today, you’ll have seen just how gorgeous and easy the Butterfly Garden Kit is from the Stampin’ Up! Kits Collection!

This all-inclusive kit is perfect for those days when you want to create something beautiful without pulling out your entire craft room. Everything you need comes right in the box — making it ideal for beginners, busy crafters, or anyone who simply loves a quick and satisfying creative session.


What’s Included in the Butterfly Garden Kit?

This kit creates 9 cards in total —
✨ 3 different designs
✨ 3 of each design

Inside the box you’ll find:

  • Pre-cut card bases
  • Coordinating die-cut pieces
  • Embellishments
  • Adhesive
  • Step-by-step instructions

It’s truly a “grab and craft” experience. No stamping, no measuring, no guessing — just relaxing creativity.


Perfect for Quick Crafting

One of the things I love most about the Kits Collection is how convenient they are. Whether you’re crafting at the kitchen table, taking supplies away on retreat, or fitting in a little creative time between life’s busy moments, this kit makes it simple.

The butterfly imagery is soft, fresh and uplifting — making these cards perfect for birthdays, thank you cards, or just sending a little happy mail to someone special.


Stepping It Up – Simple Changes, Big Impact

During my Facebook Live, I also shared how you can easily change up one of each card design to make it your own — even with an all-inclusive kit.

Here are a few ideas I demonstrated:

  • Rearranging the die-cut elements for a different layout
  • Adding extra dimension with foam adhesive
  • Layering elements in a new way
  • Swapping sentiment placements

It just goes to show that even when everything is provided for you, there’s still room to let your creativity shine!

If you already have a few extra supplies in your craft room, you can easily step these up even further — but you absolutely don’t need to. The kit is beautiful exactly as designed.


Who Is This Kit For?

🦋 New crafters who want everything ready to go
🦋 Busy creatives who love convenience
🦋 Anyone wanting a thoughtful handmade card stash
🦋 A lovely gift idea for a friend

It’s also a wonderful way to introduce someone to papercrafting without overwhelming them.


If you missed my Facebook Live, make sure you head over and watch the replay to see the alternative versions I created. I love showing how you can take something simple and add your own little twist!

If you’d like to get your hands on the Butterfly Garden Kit, you can order it through my online store and have it delivered straight to your door.

Happy crafting! 🦋✨

Product List
Butterfly Garden Kit (English) [ 167266 ]
$42.00
Basic White A4 Cardstock [ 166781 ]
$25.00
Secret Sea A4 Cardstock [ 165296 ]
$25.00
Misty Moonlight Classic Stampin' Pad [ 153118 ]
$15.75

Happy Happenings Kit

There is something so satisfying about opening a kit and knowing that everything you need is right there in the box — and the Happy Happenings Kit delivers exactly that.

This all-inclusive kit contains:

  • A stamp set
  • Ink spot
  • Clear stamping block
  • Pre-cut card bases and elements
  • Adhesive
  • Envelopes
  • Step-by-step instructions

And it makes 9 beautiful cards ready to celebrate life’s special moments.


Why I Love the Happy Happenings Kit

The Happy Happenings Kit is perfect for both beginners and experienced crafters. If you’re just starting out, you’ll love that it includes the stamps, ink and block — no extra supplies required. If you’re more experienced, you’ll enjoy the flexibility to make the designs your own.

The sentiments in this kit are versatile and uplifting, making it ideal for birthdays, congratulations, thank you cards and everyday celebrations.


I Changed Up the Designs!

While the instructions give you gorgeous layouts to follow, I couldn’t resist adding my own little creative twist.

That’s the beauty of a stamping kit — once you have the stamps and ink, you can:

  • Change the placement of elements
  • Add extra stamping for background detail
  • Flip layouts horizontally or vertically
  • Layer pieces differently for added dimension
  • Create alternative designs using the same supplies

I love showing that kits are not just “assemble as shown” — they are a starting point for creativity.


Perfect for Crafting at Home or With Friends

The Happy Happenings Kit would be fantastic for:

  • A relaxed craft afternoon
  • Gifting to a friend who wants to try stamping
  • Taking along to a retreat
  • Having on hand for quick cardmaking sessions

Because everything is coordinated, you get professional-looking results every time.


If you’d like to see how I changed up the designs, be sure to check out my latest video and let me know which version you prefer — the original layout or my alternative creations.

Creativity doesn’t have to be complicated — sometimes it just starts with opening a box and saying, “What if I tried this instead?”

Product List
Happy Happenings Kit (English) [ 167271 ]
$42.00

Lots to Love Kit

The Lots to Love kit is a fabulous kit in Stampin’ Up!’s Kit Collection.

If you’re looking for a quick, beautiful, and completely stress-free crafting experience, the Lots to Love Kit is such a joy to create with! I went live on Facebook on Friday to put this kit together — and let’s just say it was a little more “creative” than usual in more ways than one.

With my internet down, I had to stream the live using my phone instead of my normal streaming system. But you know what? Crafting is all about adapting and getting creative — and this kit made that part easy!


One of the things I absolutely love about the Lots to Love Kit is that it’s a non-stamping kit. That means:

  • ✔ No stamps
  • ✔ No ink
  • ✔ No stamping blocks
  • ✔ No prior experience needed

Everything is ready to go right out of the box. The pieces are pre-printed, pre-cut, and beautifully coordinated — all you need to do is assemble.

This makes it perfect for:

  • Beginner cardmakers
  • Crafting with kids or friends
  • Taking to a retreat or away on holidays
  • A quick creative session when time is short

It’s truly cardmaking made simple — but still stunning.


Why I Love the Lots to Love Kit

The designs in the Lots to Love Kit are fresh, modern, and full of warmth. The layering pieces create dimension without needing any special tools, and the colour palette is beautifully balanced.

What I especially enjoyed during today’s Facebook Live was how relaxing it felt to just assemble. No measuring. No die cutting. No decision fatigue. Just opening the box and creating.

Even though my setup wasn’t my usual polished system, the kit really shone on camera because the designs are already so thoughtfully put together.


Perfect for Busy Crafters

As someone who juggles a full schedule, I truly appreciate having something in my craft space that I can pull out and complete in one sitting. The Lots to Love Kit gives you that instant creative satisfaction without the prep work.

It would also make a beautiful gift — either assembled cards ready to give, or the kit itself for a crafty friend.


Watch the Replay

If you missed the Facebook Live, you can catch the replay over on my YouTube Channel but I’ve also listed the video below for you.

If you’d like to add the Lots to Love Kit to your collection, you can shop it through my online store. It’s a wonderful addition to your craft stash — especially if you love quick, coordinated, no-stamp projects.

Let me know in the comments — do you enjoy non-stamping kits, or are you a stamping-is-a-must kind of crafter? 💕

Product List
Lots To Love Kit [ 167263 ]
$27.00

Gears & Textures – Masculine part 2

Recently on my Facebook Live I created with the Gears & Textures Stamp Set. You can see other cards I created with this set here. After the first three cards I created I wanted to change it up a bit and using the masking technique I got to work and used a post it note to cover over a section of the card. I then proceeded to stamp the images randomly over the card, overlapping the post it. Using blending brushes and Old Olive ink I added some ink over the card front.

Once I’d finished stamping and adding ink I peeled back the post it to reveal my card and then stamped my sentiment in the blank space. Then layered each card front onto coordinating card stock. Really #simplestamping cards for you to recreate with a bonus masking technique thrown in.

Gears & Textures – Masculine

Below is the quick version from my Facebook live, but you can also check out my long version with measurements here.

Product List
Gears & Textures Photopolymer Stamp Set [ 166851 ]
$35.00
Gears & Textures Dies [ 166853 ]
$53.00
Gears & Textures Bundle (English) [ 166854 ]
$79.00
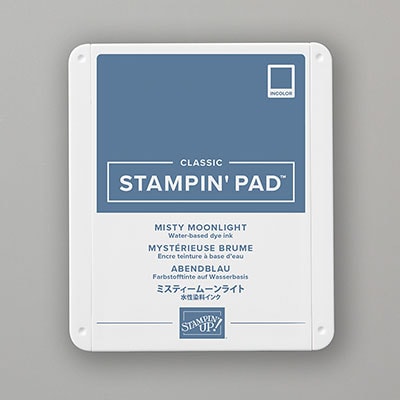
Misty Moonlight Classic Stampin' Pad [ 153118 ]
$15.75
Misty Moonlight A4 Cardstock [ 153086 ]
$25.00
Old Olive Classic Stampin' Pad [ 147090 ]
$15.75
Old Olive A4 Card Stock [ 106576 ]
$25.00
Cajun Craze Classic Stampin' Pad [ 147085 ]
$15.75
Cajun Craze A4 Card Stock [ 121683 ]
$25.00
Blending Brushes [ 153611 ]
$27.00
Stampin' Seal [ 152813 ]
$14.00
Paper Trimmer [ 152392 ]
$49.00

Gears & Textures – Masculine

Recently on my Facebook Live I created with the Gears & Textures Stamp Set. You can see other cards I created with this set here. I chose to create some simple stamping cards which can be easily duplicated. I had used the inspiration from Crafty Rootes in the UK to create my first card. That was enough of a spring board to get me doing the next card and then the next and so on. It was great to be able to just create and to continue to get the creatively flowing so easily just with copying one card but changing up the colours.

Changing up the colours from the original design that I saw, I created the first card with the long images stamped diagonally on the page alternating the colours. On the insert I stamped the long images again on an angle which helped me jump to the next card. Having the images diagonally from either end and then stamping in the centre changes the card. And on the insert I stamped the images up and down which led me to my third card in this set. I chose to stamp the images from top to bottom on one side with the sentiment stamped at he bottom right of the card. Then layer each card front onto coordinating card stock. Really #simplestamping cards for you to recreate.

Gears & Textures – Masculine

Below is the quick version from my Facebook live, but you can also check out my long version with measurements here.

Product List
Gears & Textures Photopolymer Stamp Set [ 166851 ]
$35.00
Gears & Textures Dies [ 166853 ]
$53.00
Gears & Textures Bundle (English) [ 166854 ]
$79.00
Misty Moonlight Classic Stampin' Pad [ 153118 ]
$15.75
Misty Moonlight A4 Cardstock [ 153086 ]
$25.00
Old Olive Classic Stampin' Pad [ 147090 ]
$15.75
Old Olive A4 Card Stock [ 106576 ]
$25.00
Cajun Craze Classic Stampin' Pad [ 147085 ]
$15.75
Cajun Craze A4 Card Stock [ 121683 ]
$25.00
Blending Brushes [ 153611 ]
$27.00
Stampin' Seal [ 152813 ]
$14.00
Paper Trimmer [ 152392 ]
$49.00

Gears & Textures – Part 2

For my third & forth Stamp-a-Stack cards using the Gears & Textures Stamp Set, I kept with the same layout but changed up the embossing folders and switched the colours to keep things fairly clean and simple while still letting the textures and layers do the talking. I love cards that look detailed but are actually very achievable to recreate — perfect for a class setting. The embossing folders I used were Exposed Brick & the Beautiful Pattern 3D Embossing folders

One of my favourite things about this design is how easily it could be adapted. Change the sentiment, swap out the colours, or add a little embellishment, and you suddenly have a card suitable for lots of different occasions. This is exactly the kind of versatile design I love including in a Stamp-a-Stack — something you can confidently recreate again and again at home.

All the products I used for these cards are listed below, along with a photo so you can see the details up close.

Gears & Textures

Product List
Gears & Textures Photopolymer Stamp Set [ 166851 ]
$35.00
Gears & Textures Dies [ 166853 ]
$53.00
Gears & Textures Bundle (English) [ 166854 ]
$79.00
Stampin' Seal [ 152813 ]
$14.00
Paper Trimmer [ 152392 ]
$49.00
Lemon Lime Twist Classic Stampin' Pad [ 147145 ]
$15.75
Lemon Lime Twist A4 Cardstock [ 144250 ]
$25.00
Blueberry Bushel Classic Stampin' Pad [ 147138 ]
$15.75
Blueberry Bushel A4 Cardstock [ 146991 ]
$25.00
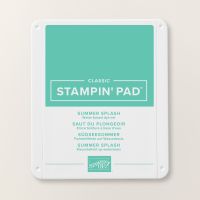
Summer Splash Classic Stampin Pad [ 163809 ]
$15.75
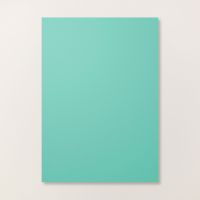
Summer Splash A4 Cardstock [ 163798 ]
$25.00
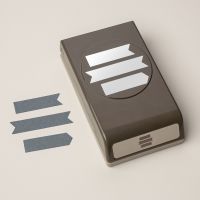
Three Banner Punch [ 167050 ]
$46.00
Basic White A4 Cardstock [ 166781 ]
$25.00