Elegant Texture & Botanical Beauty with Nature’s Symphony Bundle

This card really highlights how beautifully the Nature’s Symphony Bundle works with texture. The embossed background paired with the detailed leaf images creates a gorgeous balance of soft and bold elements. Another card I created with this bundle is here.

I kept the layout clean and uncluttered so the leafy focal point could truly shine. A simple sentiment finishes it off perfectly—sometimes less really is more.

This design would be perfect for a thank-you card, thinking-of-you card, or even a sympathy card depending on the sentiment you choose.

🎥 I’ve shared the full process in the video below, including tips for layering and placement all using the Nature’s Symphony Bundle.

Scroll down to see the full supply list, and don’t forget—you can easily change up the colours to suit your own style or stash.

Product List
Nature's Symphony Bundle (English) [ 166926 ]
$82.75
Nature Walk 12" X 12" (30.5 X 30.5 Cm) Designer Series Paper [ 166912 ]
$21.75
Stylish Shapes Dies [ 159183 ]
$53.00
Stone & Vine 3 D Embossing Folder [ 166990 ]
$17.50
Pretty Peacock A4 Cardstock [ 150886 ]
$25.00
Pretty Peacock Classic Stampin’ Pad [ 150083 ]
$15.75
Basic White A4 Cardstock [ 166781 ]
$25.00
Moody Palette Glossy Dots [ 167180 ]
$14.00
Stampin' Cut & Emboss Machine [ 149653 ]
$244.00
Paper Trimmer [ 152392 ]
$49.00

Nature’s Symphony Bundle – Soft Layers & a Simple Hello

There’s something so calming about creating with nature-inspired products, and the Nature’s Symphony Bundle is no exception. Today’s card features soft layers, beautiful leafy images, and a simple “hello” greeting that makes it perfect for just about any occasion.

I love how the layered leaves add gentle movement without overwhelming the design. The subtle texture in the background keeps everything feeling elegant and timeless, while the Pretty Peacock tones really let the nature theme shine.

This is the kind of card you can mass-produce easily but still feel proud to give—it’s simple, stylish, and heartfelt all at once.

👉 Watch the video tutorial below where I walk you through how this card and all the others I created comes together step by step using the Nature’s Symphony Bundle.

All the Stampin’ Up! products used on this card are listed below. If you have any questions or would like to create along with me, feel free to reach out—I’d love to help.

Product List
Nature's Symphony Bundle (English) [ 166926 ]
$82.75
Nature Walk 12" X 12" (30.5 X 30.5 Cm) Designer Series Paper [ 166912 ]
$21.75
Stylish Shapes Dies [ 159183 ]
$53.00
Stone & Vine 3 D Embossing Folder [ 166990 ]
$17.50
Pretty Peacock A4 Cardstock [ 150886 ]
$25.00
Pretty Peacock Classic Stampin’ Pad [ 150083 ]
$15.75
Basic White A4 Cardstock [ 166781 ]
$25.00
Moody Palette Glossy Dots [ 167180 ]
$14.00
Stampin' Cut & Emboss Machine [ 149653 ]
$244.00
Paper Trimmer [ 152392 ]
$49.00

Grungy Gears & Textures Card 2

On my Facebook live recently I wanted to include the dies from the Gears & Textures Bundle and so I created these Grungy Gears & Textures cards. I had so much fun creating these cards. The second card I’m sharing was just created on the fly without any real idea in mind except to use the die cuts I had pre-prepared.

How I created the card

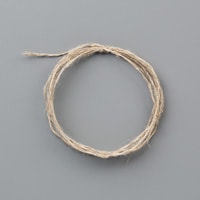
I pulled out my blending brushes some Nature Walk designer series paper and got to work on creating the card below. Roughing up the edges of the vanilla card and then inking up the edges with basic gray ink. Stamping images randomly on the card front in various colours. I added some linen thread around the centre of the card front and also added on the die cuts that I’d also added some basic gray ink to.

I stamped the sentiment onto a piece of designer series paper to make it look worn, I then grabbed another piece of DSP and tore off the edge, scrunched it up and also added ink to it to give a good distressed look.

Once I finished stamping the background, adding the trim and all the die cuts, I added the sentiment with dimensionals to pop them up. The basic gray card base I added some ink around the edges of it and then glued the card front onto the card base. Stamping a piece of vanilla card for the insert and then I was done.

I’ll share the video of how I made these cards soon or you can check them out here. You can also check out some of my other cards that I’ve made using this stamp set here.

Grungy Gears & Textures Card 2

Product List
Gears & Textures Photopolymer Stamp Set [ 166851 ]
$35.00
Gears & Textures Dies [ 166853 ]
$53.00
Gears & Textures Bundle (English) [ 166854 ]
$79.00
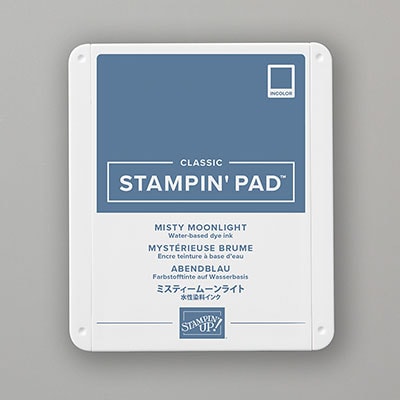
Misty Moonlight Classic Stampin' Pad [ 153118 ]
$15.75
Misty Moonlight A4 Cardstock [ 153086 ]
$25.00
Blending Brushes [ 153611 ]
$27.00
Stampin' Seal [ 152813 ]
$14.00
Paper Trimmer [ 152392 ]
$49.00
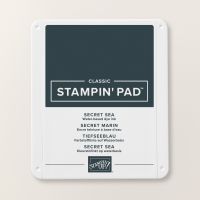
Secret Sea A4 Cardstock [ 165296 ]
$25.00
Secret Sea Classic Stampin' Pad [ 165285 ]
$15.75
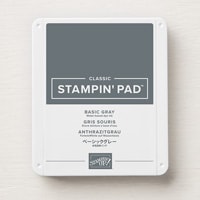
Basic Gray Classic Stampin' Pad [ 149165 ]
$15.75
Basic Gray A4 Card Stock [ 121689 ]
$25.00
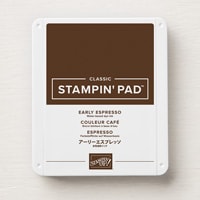
Early Espresso Classic Stampin' Pad [ 147114 ]
$15.75
Basic Black A4 Card Stock [ 121688 ]
$25.00
Very Vanilla A4 Cardstock [ 166785 ]
$25.00
Linen Thread [ 104199 ]
$8.75
Black & White & Gold Baker's Twine [ 166005 ]
$15.00
Nature Walk 12" X 12" (30.5 X 30.5 Cm) Designer Series Paper [ 166912 ]
$21.75
Pretty Peacock Classic Stampin’ Pad [ 150083 ]
$15.75

Grungy Gears & Textures

On my Facebook live recently I wanted to include the dies from the Gears & Textures Bundle and so I created these Grungy Gears & Textures cards. I had so much fun creating these cards. The first card I’ll share with you was inspired by Rochelle Blok back from March 2019. She used a different stamp set but is similar to the gears & textures set that we have and pulling in the Nature Walk DSP make it so much easier to create with.

How I created the card

I pulled out my blending brushes and got to work on creating the card below. Roughing up the edges of the designer series paper to make it look worn, I then added early espresso ink as I wanted a dark colour but not black. Using the blending brushes, I added additional colour to the die cuts as well to darken them. They almost look black. Stamping the images onto the DSP adds another layer of to the card.

Once I finished stamping the background I started layering up the die cuts and then looked for something to stamp on for the sentiment. I know vanilla or white wasn’t going to work on such a dark card so I chose a piece of dsp from the Nature walk pack and again roughed up the edges, stamped the sentiment in early espresso ink and also added some pretty peacock ink to the sentiment piece to darken it up but I knew I didn’t want it to be too dark. Adding the black and gold bakers twine onto the back and another die cut to the back and I attached the sentiment with dimensionals.

Inside the card I added a piece of vanilla cardstock and stamped a couple of images on that before gluing into the card. I’ll share the video of how I made these cards soon or you can check them out here. You can also check out some of my other cards that I’ve made using this stamp set here.

Grungy Gears & Textures Card 1

Product List
Gears & Textures Photopolymer Stamp Set [ 166851 ]
$35.00
Gears & Textures Dies [ 166853 ]
$53.00
Gears & Textures Bundle (English) [ 166854 ]
$79.00
Misty Moonlight Classic Stampin' Pad [ 153118 ]
$15.75
Misty Moonlight A4 Cardstock [ 153086 ]
$25.00
Blending Brushes [ 153611 ]
$27.00
Stampin' Seal [ 152813 ]
$14.00
Paper Trimmer [ 152392 ]
$49.00
Secret Sea A4 Cardstock [ 165296 ]
$25.00
Secret Sea Classic Stampin' Pad [ 165285 ]
$15.75
Basic Gray Classic Stampin' Pad [ 149165 ]
$15.75
Basic Gray A4 Card Stock [ 121689 ]
$25.00
Early Espresso Classic Stampin' Pad [ 147114 ]
$15.75
Basic Black A4 Card Stock [ 121688 ]
$25.00
Very Vanilla A4 Cardstock [ 166785 ]
$25.00
Linen Thread [ 104199 ]
$8.75
Black & White & Gold Baker's Twine [ 166005 ]
$15.00
Nature Walk 12" X 12" (30.5 X 30.5 Cm) Designer Series Paper [ 166912 ]
$21.75
Pretty Peacock Classic Stampin’ Pad [ 150083 ]
$15.75

Gears & Textures – Part 2

For my third & forth Stamp-a-Stack cards using the Gears & Textures Stamp Set, I kept with the same layout but changed up the embossing folders and switched the colours to keep things fairly clean and simple while still letting the textures and layers do the talking. I love cards that look detailed but are actually very achievable to recreate — perfect for a class setting. The embossing folders I used were Exposed Brick & the Beautiful Pattern 3D Embossing folders

One of my favourite things about this design is how easily it could be adapted. Change the sentiment, swap out the colours, or add a little embellishment, and you suddenly have a card suitable for lots of different occasions. This is exactly the kind of versatile design I love including in a Stamp-a-Stack — something you can confidently recreate again and again at home.

All the products I used for these cards are listed below, along with a photo so you can see the details up close.

Gears & Textures

Product List
Gears & Textures Photopolymer Stamp Set [ 166851 ]
$35.00
Gears & Textures Dies [ 166853 ]
$53.00
Gears & Textures Bundle (English) [ 166854 ]
$79.00
Stampin' Seal [ 152813 ]
$14.00
Paper Trimmer [ 152392 ]
$49.00
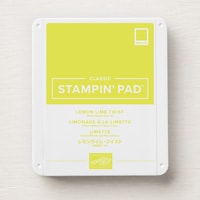
Lemon Lime Twist Classic Stampin' Pad [ 147145 ]
$15.75
Lemon Lime Twist A4 Cardstock [ 144250 ]
$25.00
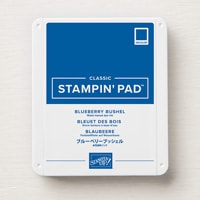
Blueberry Bushel Classic Stampin' Pad [ 147138 ]
$15.75
Blueberry Bushel A4 Cardstock [ 146991 ]
$25.00
Summer Splash Classic Stampin Pad [ 163809 ]
$15.75
Summer Splash A4 Cardstock [ 163798 ]
$25.00
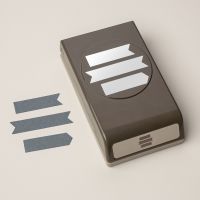
Three Banner Punch [ 167050 ]
$46.00
Basic White A4 Cardstock [ 166781 ]
$25.00

Stamp a Stack & Sip Class

I am starting up my Stamp a Stack & Sip Classes again and my first ones are this coming weekend.

🎄 Let’s get festive and crafty!
Join me for a Stamp-a-Stack cardmaking class where we’ll create 8 beautiful Christmas cards using the Ornamental Christmas stamp set.

 When: Friday 17th October from 7.30pm
OR
 When: Saturday 18th October from 10-12pm
🎨 Cost: $45 — or FREE with a $60 Stampin’ Up! order!
Bring along your favourite wine or drink.
Tea, coffee, hot chocolate available.
BYO your own Adhesives or purchase some at the class.

It’s the perfect way to get a head start on your Christmas cards while having a fun, creative night out!
Spots are limited — book your seat today!

Product List

Gathering Moments Christmas

Last week I decided to play with the Gathering Moments Stamp set like I did the week before on my Facebook Live. However this time I wanted to create some Christmas cards instead. I decided to do similar to last week creating a 4 Square project. Stamping in the shape of a cross on an A4 Card stock piece and then chopped it down from there. I then started creating with some blues as well.

What do you think? Which card do you like the best?

Gathering Moments Christmas cards

Below is the video that I created on my Facebook Live last week. This is my quick video so if you’d like to see how I created these cards with some more details, you’ll need to go to my youtube channel and then check out the longer video.

Product List